
Gameplay 201: The First Unit Turn [SHE3PDOG]
We’ve discussed the models and building draft in previous MonPoc 101 articles, and reading those prior to this article will aid you in understanding it if you’re a newer player. You may also notice that the naming convention has changed. These articles are beginning to build on each other enough that changing the name to include 201, 301, etc. seems like a helpful way to connote that future articles rely on a good amount of game knowledge from the 101 series or simply gaining experience by playing games. That said, if there are basic MonPoc principles that you feel have been left out of the 101 series, please let me know, and I will consider adding them! These course-numbered articles will still explain things in great detail, and use examples where relevant to ensure that the points being made get across.
Introduction
Today we will be discussing your first turn. It can be overwhelming to look down at your 20 units, the 16-24 buildings on the map, and the numerous power zones, negative zones, spawn points, and terrain features scattered about while trying to plan out what to do on your first turn. Your first turn will also usually look very different depending on whether you are first or second player, and while we will be focusing on first player for this article, the next article will focus more on second player. Before we go too far down that rabbit hole though, let’s first look at the handful of mechanics you should remember for the beginning of a game of Monsterpocalypse.
Review of Mechanics
When players show up to the table with their respective lists, the first thing they do is roll off. Each player rolls 5 action dice, and the player with the highest number of strikes decides the turn order. In cases of a tie, players simply reroll until one player has more strikes than the other. The second player in the turn order gets to select the map which can actually be a big advantage if done properly, so the player that wins the roll off may not always opt to go first depending on the match they find themselves in. There are also other advantages to going first or second, and while we will cover some of them here, a separate article will more thoroughly cover these topics.

After second player has selected a map, the building draft begins with players placing buildings in turn order, filling the green foundations before the yellow foundations on the map. Generally, players attempt to get buildings they would like to secure for their actions or discounts in the best spots in their own backlines while attempting to prevent their opponents from doing the same (see Buildings 101 and Building Archetypes & the Draft if you need a refresher on the specifics here). Some of what we lay out in this article might help inform your decisions during this critical period of the game, so keep it in mind as we continue.
Once the building draft has been completed, each player places both of their monsters on the map in turn order. A player’s monsters must be placed so that the edge of their base is touching the map edge nearest to that player. While there are some considerations to keep in mind here, the basic idea is that you want your monsters to have access to as much of the map as possible. Keep slower monsters or pedestrians nearer to the center, or the clearest path to the center of the map, but faster monsters with high mobility can be a little farther out as they have an easier time traversing buildings.
First Player
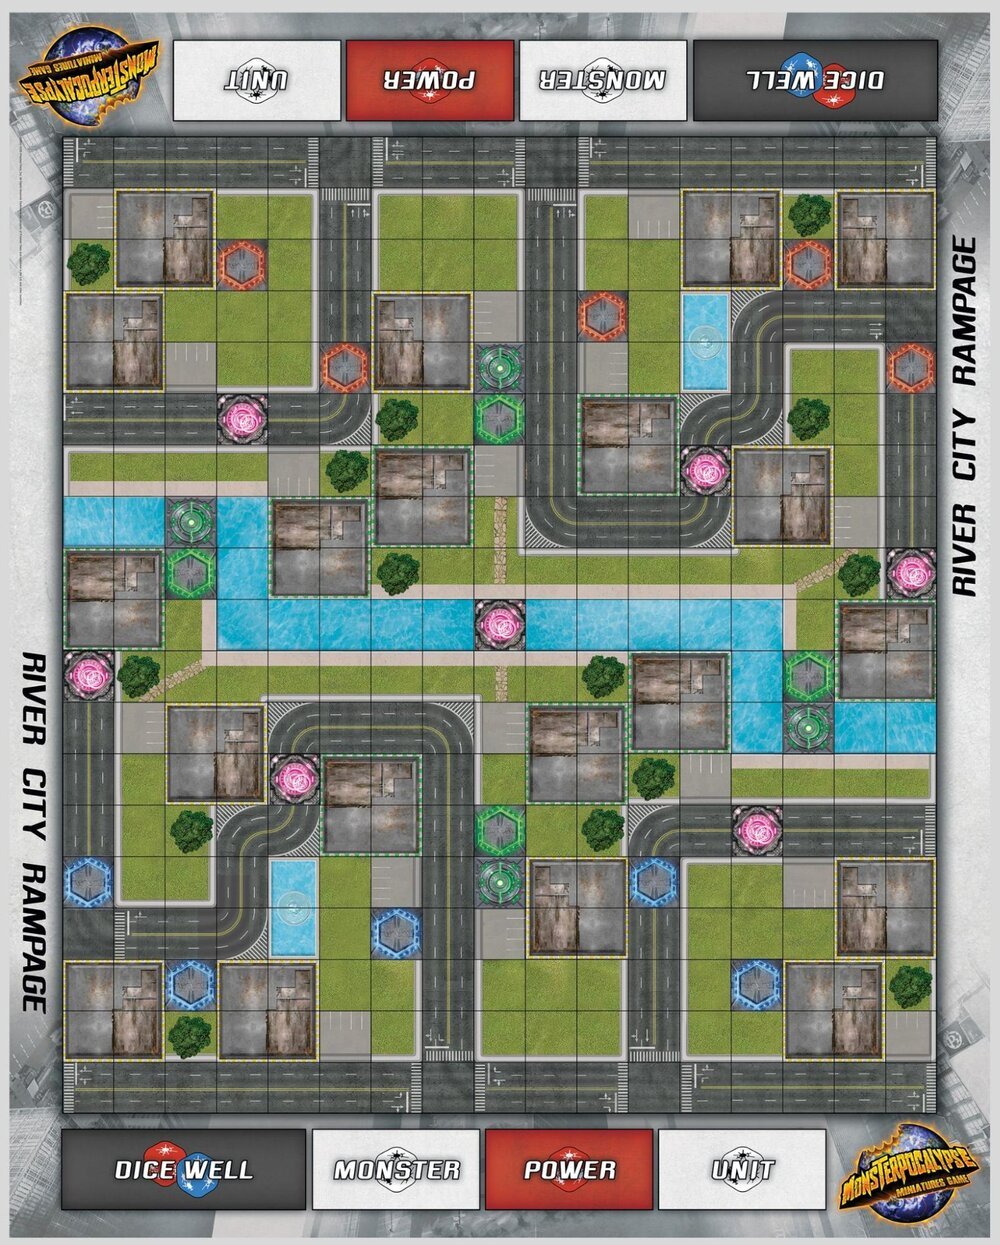
As an example, we will be looking at one of my favorite maps, Destruction Junction. While opinions certainly differ on what constitutes a good map among competitive players, I like selecting Destruction Junction from second position because of how close the power zones are to each other, and the difficulty first player has in using the available buildings to screen their monsters from an aggressive map position.

So, as first player, where do we start? There are a few ways to answer this, but let’s begin with a quick bit of terminology. We will be referring to the first player’s first turn as the top of 1, and the second player’s first turn as bottom of 1. Each subsequent turn is similarly formatted, but keeping track beyond turn 2 is rarely important as MonPoc does not impose a turn limit on players. On top of 1, you can try to be very conservative, securing only buildings and power zones near to your own map edge, or you can be aggressive, trying to spread out and take as many power zones as possible while securing just a building or two. There are, of course, advantages and disadvantages to each mindset. Holding a power zone requires a single unit, and if you’re following the basic principles set forth in the Units 101 and The Four Unit Archetypes articles, these units aren’t going to be easily removed. Securing a building, on the other hand, requires that you utilize three units. The power zones you hold and buildings you secure are collectively called your power base.
Holding power zones typically requires fewer resources, but they also tend to be closer to your opponent’s side of the map which can make them easier to access. While securing buildings is more resource intensive, it also provides you access to powerful discounts and special abilities that might help you out. Additionally, there are a lot of building foundations that can allow you to use the same 3 units to secure two buildings which helps out from an efficiency standpoint. However, while buildings you would like to secure tend to be farther from your opponent’s side of the map, they are also easier to disrupt. Remember that buildings are only considered secured if there are no enemy models adjacent to them, so your opponent could just use a fast unit to zip up the board and disrupt your building secures without ever throwing dice.
There’s one other important thing to keep in mind that my fellow author, Maren, loves to remind players about: it takes at least 2 action dice to destroy a unit on the first turn. If second player wants to disrupt your power base, it will tend to cost them more than it did you to build it. Destroying one of your units requires them to spend at least one action die to spawn a unit, and at least one action die to make an attack. It is also more difficult for your opponent to build a power base of their own if they are expending resources to destroy your units, or if you have units on power zones even near to your opponent’s map edge. However, remember that your opponent also generates power dice by destroying your units, so keep that in mind as you set up your power base.
While simply thinking about these principles will inform your decisions on your first turn, we can look at an example from a competitive list. This may also give you some ideas about what you can include in your own lists to maximize the amount of power dice you threaten to power up for on your following monster activation.
Top of 1 Example
The example we will be looking at here would be considered extremely aggressive which is how I personally like to play my top of 1 turns. However, bear in mind that this is not the only way to play this out, and your specific turn will be heavily influenced by the models you have available in your list. This example is from the Protectors player’s perspective, and it uses the following units and relevant buildings:
Buildings: Toxic Waste Depot and World Clock
Units: Temple Giant, Humusoid, Arbiter Monolith, Courser, Hummingbird Spirit, Interceptor, C-Type Shinobi Elite, and Sun Fighter
The cards for each of these will appear in the example as each model comes up.
First, we’ll look at our starting position.


From here, a very common move is to secure a building that provides a discount. The current premier way to do this in competitive lists is to use an Aggressive unit (Humusoid for Protectors, Lake Serpent for Destroyers) followed by a Quorum unit (Temple Giant for Protectors, Juror for Destroyers). This allows you to use a single spawn point to fully secure a building for 4 action dice. So, let’s secure our World Clock.

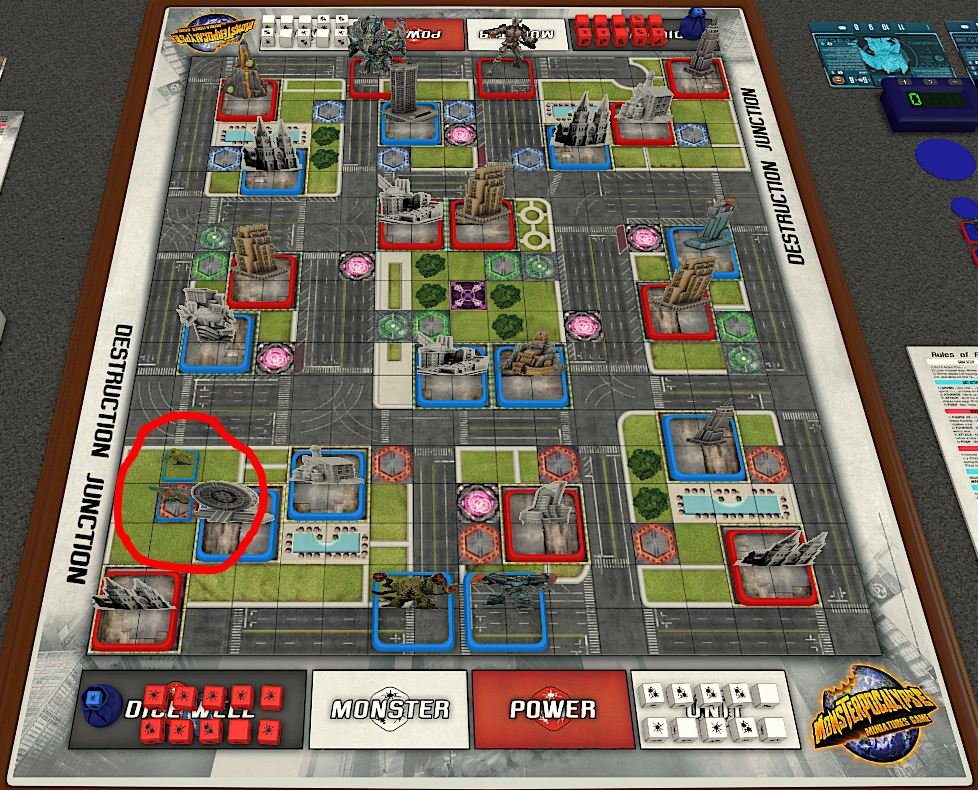

Now that our World Clock is secured, we get a discount of 1 action die on the next First Guardians unit that we summon. So, we will go ahead and summon an Arbiter Monolith for a single action die. This is a particularly good unit to summon on your first turn thanks to the Amplify ability which allows the Arbiter Monolith to generate an additional power die for you when you power up while it is holding a power zone. However, it is also extremely slow, so you need to spawn it close enough to a power zone that it can actually reach it with SPD 3.

Now we’re threatening the ability to power up for 3 once our Arbiter Monolith has moved into the correct position as we will be securing a building and holding a power zone. However, we still have 5 action dice to spend. We would really like to take as many power zones as possible, and the Toxic Waste Depot to the right of our World Clock can help us out with that. As a Protectors player, we also have access to several fast, DEF 3 units which are perfect for holding power zones. From left to right, the models we’ve summoned, circled in red, are the Courser, Hummingbird Spirit, and Interceptor.


We still have 2 action dice left. These will be used to perform actions that will allow us to extend the reach of our units to more power zones. Now we move on to the movement phase which we will discuss from left to right. We will have the Humusoid move up to the nearest power zone. The Temple Giant will move to the space adjacent to both the World Clock and Toxic Waste Depot to help secure both of them. The Courser will move up to the power zone adjacent to the red Reclamation Facility on the left side of the map. The Hummingbird Spirit will move to the impassable terrain adjacent to both the World Clock and Toxic Waste Depot in order to secure both buildings which it can do thanks to the Hover special rule. The Arbiter Monolith will move to the power zone nearest our side of the map edge. Finally, the Interceptor will move all the way up to the nearest power zone on the right side of the map.

This next bit gets a little interesting. We still have 2 action dice available, and we are now securing the excellent Toxic Waste Depot, a building I believe should be in every list regardless of whether you are playing Destroyers or Protectors.

Additionally, our Interceptor has the Transport action which allows us to place a C-Type Shinobi Elite adjacent to it due to the Cargo special rule. This new unit will then take the power zone adjacent to the blue G.U.A.R.D. Base up and to the right from our Interceptor. Finally, we can use the Metastasize action from our secured Toxic Waste Depot to place a Sun Fighter adjacent to our new C-Type Shinobi Elite. This Sun Fighter will then take the last power power zone on the map, all the way in our opponent’s backline. While the Sun Fighter is a mere DEF 2, it has the Jam special rule which is extremely relevant from the position we have it in as it prevents actions from 3 spawn points and a building until it is moved or destroyed.


Was this the best way to carry out our top of 1 turn? It really depends on what your goals are. Here, we are threatening to power up to the full 10 power dice during our monster activation (2 from buildings, 7 from power zones thanks to Amplify on the Arbiter Monolith, and 2 from the Safeguard special rule on Defender X, one of our monsters). We are certainly threatening to gain a lot of power, but our opponent has easy access to 5 of our units, so they could get many power dice of their own while limiting our ability to power up simply by destroying these units. However, almost all of the units we have out are DEF 3 or have some other trait that makes them fairly survivable, so perhaps the tradeoff is worth it. Additionally, if our opponent decides to only attempt to disrupt our ability to power up, they won’t be building a power base of their own which could impact how the rest of the game plays out.

This example is not the only way to play out a top of 1 turn. As previously stated, this would be considered a very aggressive top of 1 turn, so it illustrates how you can use the resources at your disposal to take a lot of power zones while still securing a couple of buildings as well. Some players prefer to play out their first turn more conservatively, opting to secure more buildings in their backline, or spawn hardier units that are more difficult to destroy. Many players also like to utilize the Imperial State Building on their first turn which I talk about in the Closer Look: Imperial State Building article. This is a powerful starting move that can steal key buildings from your opponent’s back line before they get the chance to use them.
Second Player
The goal from second position is to limit your opponent’s ability to power up while also building up some power dice of your own. This article has run a little long already, so we will cover this in greater detail next time. However, it is important to think about how second player will react to your unit placement when building your power base. If you build an expansive power base, you are likely allowing your opponent to get power dice for themselves by destroying some of the easy targets you have laid out for them. However, you are also rather likely to keep a good chunk of your power base around for future turns which is helpful. If you build a more conservative power base that largely sticks to your own side of the map, your opponent will have a harder time generating power dice by destroying your units, but they will also be able to build a power base for themselves more easily. This might be a good tradeoff if you have monsters that can disrupt your opponent’s power base easily on your first monster turn. Monsters with long-range blasts or high speed are pretty good at this, for instance.
Hopefully you have a better understanding of what your goals should be on your first unit turn as first player now. While you should try to build a power base, there are tradeoffs between how aggressively or conservatively your units are placed when thinking about how second player will respond. It is also important to think about how your plays in the early game will impact later stages of the game. If you are able to build up a big power base early in the game, your opponent will not be able to completely disrupt your ability to power up. This can be a major advantage in the midgame when you might be considering taking multiple monster activations back-to-back in order to get an important kill.
Keep an eye out for more Monsterpocalypse articles from SmashU coming out soon!